Industry 4.0 has been here for a decade and is developing in parallel with the fast-paced innovations in the field of Artificial Intelligence (AI) industry. At our recent Perceive 2020 conference, Qian Lin, Ph.D. of HP discussed the latest research in deep learning for visual inspection.
In comparison with industry 3.0, where rule-based logic controls and basic communication between different parts of the manufacturing unit are used to increase productivity, deep learning is a primary driver for analytics and intelligence in industry 4.0. Deep-learning-based computer vision has wide applications in automating visual inspection for quality control and analytics-driven process improvement in digital manufacturing.
 Figure 1: Four key technologies in industry 4.0
The digital industrial revolution is going to transform the manufacturing industry by incorporating AI, robotics, 3D printing, the Industrial Internet of Things (IIoT), big data and analytics. These technologies will enable the manufacturing industries to produce the products efficiently with automated quality control. Delays in quality control and inspection will reduce significantly. This in turn will result in less inventory stock, more efficient supply chains, shorter time to market, and higher capital efficiency.
Using this digital manufacturing technology, companies can do mass customization. A simple example of this technology can be found in a Spanish toy shop, where 3D printing is used to create dolls that look like their customers.
Quality control needs to be carried out during the whole manufacturing process during production. This is one of the areas that takes considerable time and cost. The industry 4.0 revolution can automate the quality control processes using technologies such as computer vision and big data analytics. Quality control automation can be applied not only to the final product but also when the components are received from the supplier, during assembling and final packaging. Computer vision can be used to find defects in products during the production stage, identifying the problem with the production process, and finally changing the production process to remove the defect.  Figure 2: Automated factory quality control is driven by computer vision
HP produces 2d and 3d printers. They test each printer before dispatch using a set of test patterns. These test patterns are then inspected visually as well as by using classical computer vision for any defects in the prints. "Classical" uses a pre-defined, rules based approach for interpreting visual data, similar to the type of technology that would be used to scan a multiple-choice form.
Printers are subjected to various levels of humidity and temperatures to see if there is any effect on the quality of the image it is printing. In this case, classical computer vision combined with manual human inspection performs very well in grading the printed samples, however, the challenge comes when producing custom prints on a very large scale. 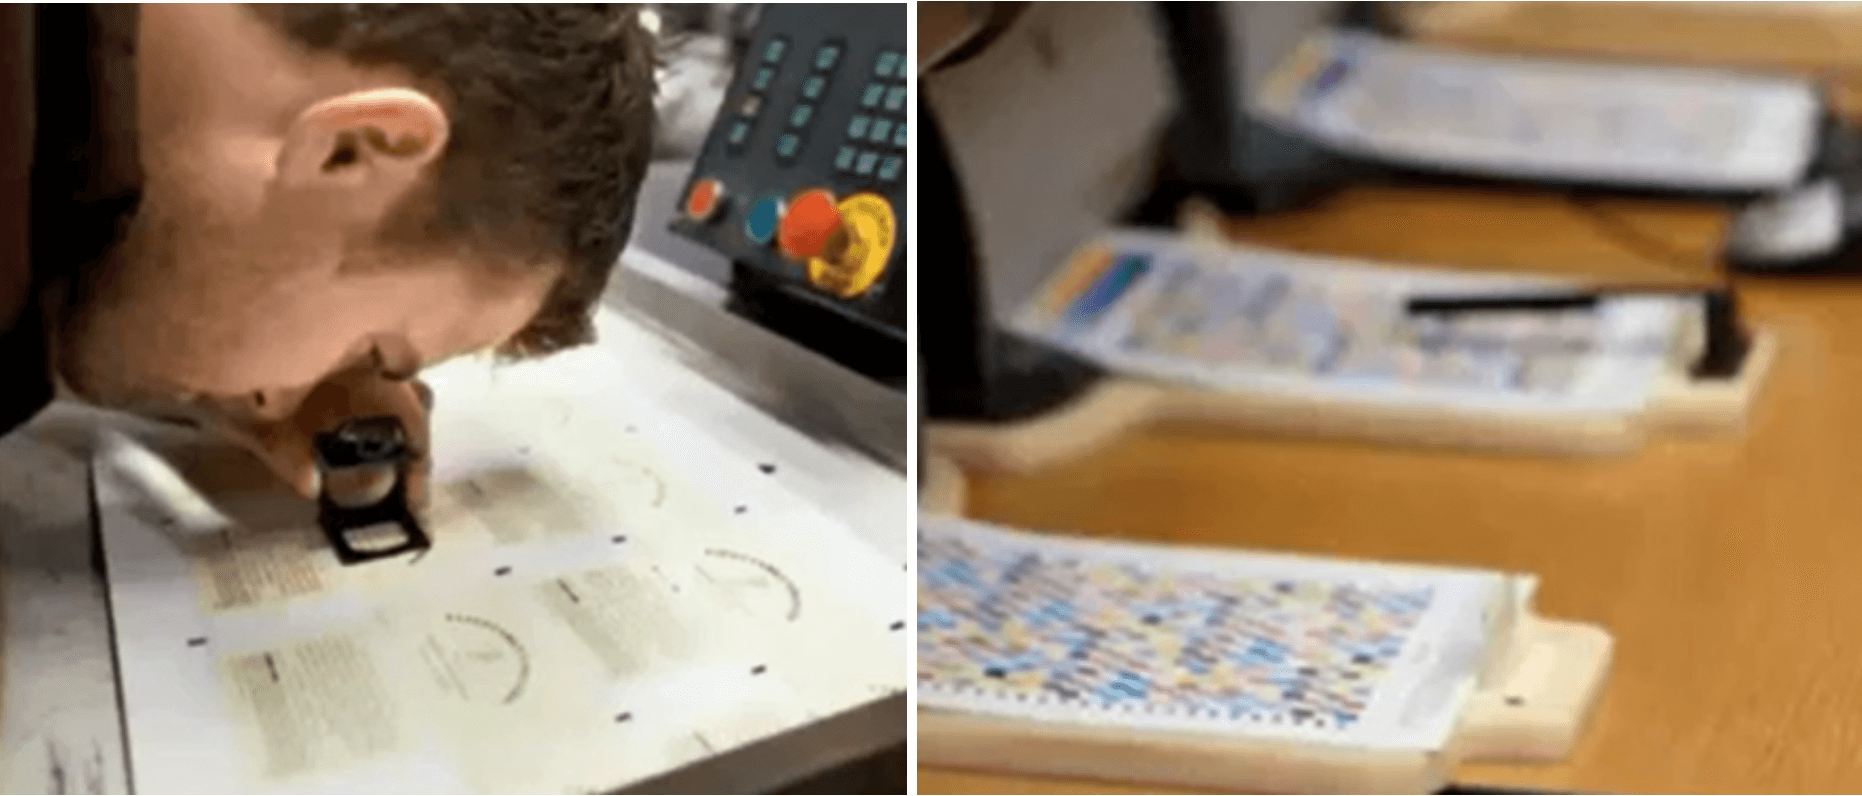 Figure 3: Human and classical computer vision inspection
At very large scale custom printing units, a major hurdle is to manually inspect each print for its quality. For example, HP PageWide web press is an industrial press for high volume commercial printing. The print speeds can be up to 1000 ft/min (305 m/min) with up to 42 inches (106.7 cm) web width.  Figure 4: HP PageWide Web Press T400 Series
At such high-speed custom printing, manual inspections quickly become unmanageable. Hiring and training a large batch of staff for visual inspection is costly and results in a high error rate. AI can automate the inspection by employing computer vision backed by deep learning. The success of deep learning is driven by advances in three key areas: large data sets to train the models, better network models, and more powerful GPUs. Figure 5: Three key areas that are necessary for efficient deep learning
To characterize the print defect, researchers have divided the task as follows:
Following are some of the examples of print defects that AI has to detect during high-speed large scale printing: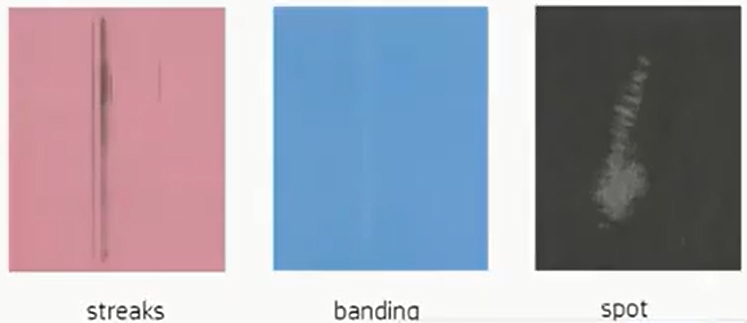 Figure 6: Some kinds of defects during printing
It can be seen that it is very hard to annotate these defects for computer vision. For example, there are a lot of pixels in streaks. The data is also not easily available to train the AI models. The solution proposed by researchers was to use simulated defects as training data and then use real defects in printed and scanned images as test data. Researchers approached this problem effectively by creating synthetic defects (streaks, color bands, etc) as shown below: Figure 7: (a) Dark Streaks: Textured region (Perlin noise) and faded edges applied to backchannel. (b). Color bands: bi-model Gaussian to model intensity + noise, applied to any CMYK channel
Researchers used the following training and testing pipeline for print defect characterization Figure 8: AI training and testing pipeline
After adding synthetic effects there are two options: Either resize the image to smaller for efficient training, or patch-based image resizing as shown in the following diagram: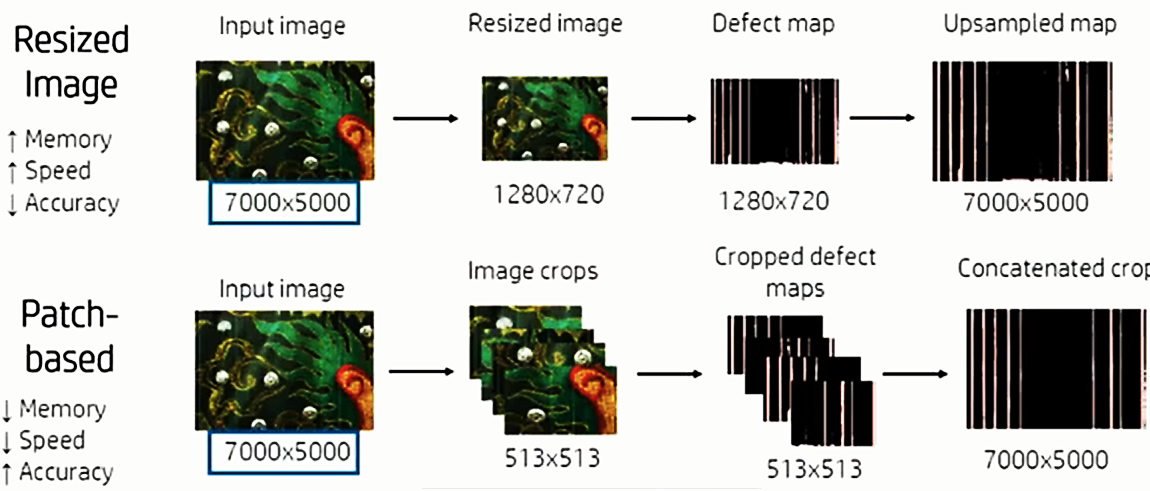 Figure 9: Image resizing and patch-based image input data as options to the ML model
The researchers found that image resizing took only 1.7 seconds to render while the patch-based method took almost 20 seconds for the same image. The latter was more accurate than the former method.
In the next step print-scan effect was added because the printed image has to be scanned by some device before inputting into the AI model for defect detection. There were two options when modeling. Either use the original reference image (Original RGB image) as an optional input or train without a reference image. Researchers found that when the model was trained without the original reference image the performance was better. 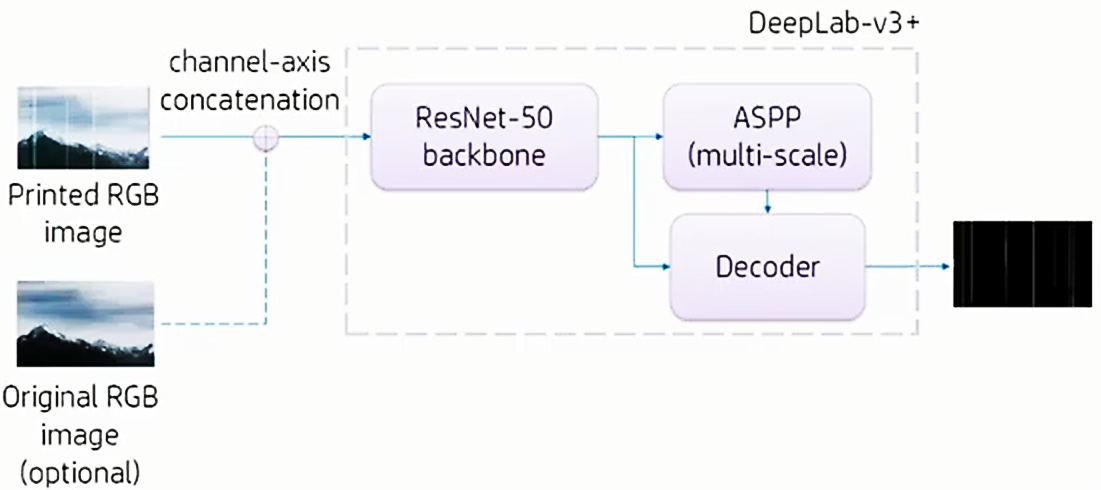 Figure 10: Model architecture
The model was tested with real data and the following were the results:
The transformation of industry 3.0 to industry 4.0 is here. This article depicted only one aspect of automation in quality control for 2D images. But the same techniques can be employed for other production systems in the future. This will reduce the delay in quality control specifically in the industries producing custom products.
© 2023 Clarifai, Inc. Terms of Service Content TakedownPrivacy Policy





© 2023 Clarifai, Inc. Terms of Service Content TakedownPrivacy Policy