
by Shanika Wickramasinghe, Major League Hacker
Image recognition can seem like magic when it recognizes objects in photos. The machine learning behind the scenes can only be as good as the dataset it’s trained on. In order for you to get that magic-like reaction, you need to be sure that you’ve supplied enough of the right example images. You can use Clarifai to not only train a machine learning model but evaluate how well you’ve trained it.
In this tutorial, we’ll train a custom model, then evaluate it using Clarifai’s Explorer. Clarifai will display the evaluation results in various matrices with each one indicating how well your model is able to recognize the objects.
To follow along with this tutorial, sign up for your free Clarifai account:
Start for free
Create Clarifai Application
First, go to your Clarifai Dashboard here and create an application.
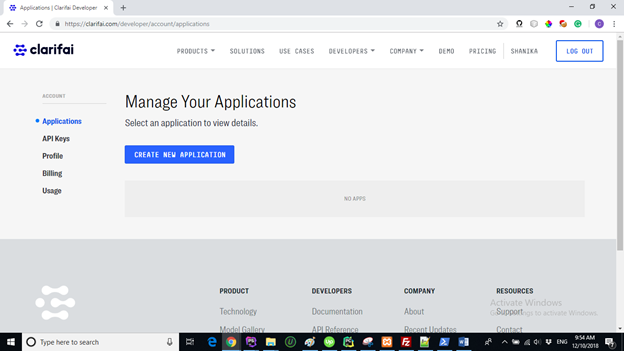
When you click Create New Application you will go to a new page.
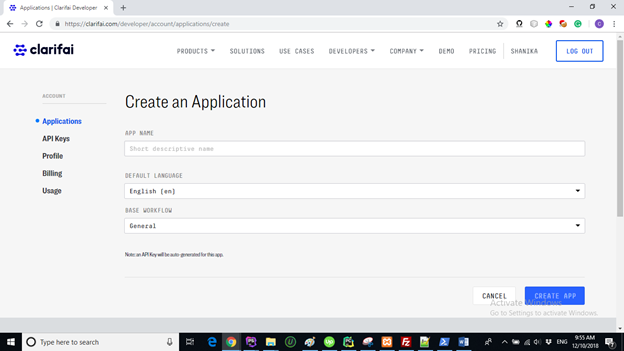
Give your application a name. If you want you can change other details. I will give Model_Evaluation as my Application name and leave the rest as the default.
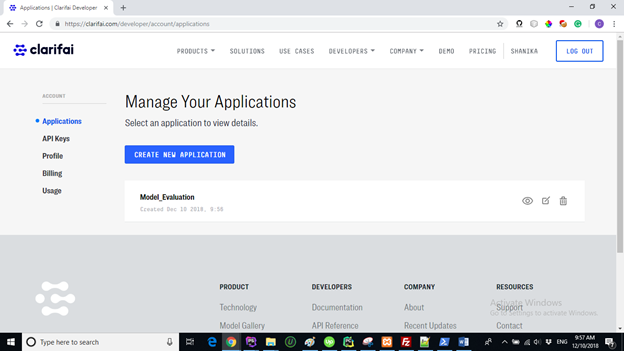
Click on your app. This will take you to a new page where you'll have a variety of options to manage your application.
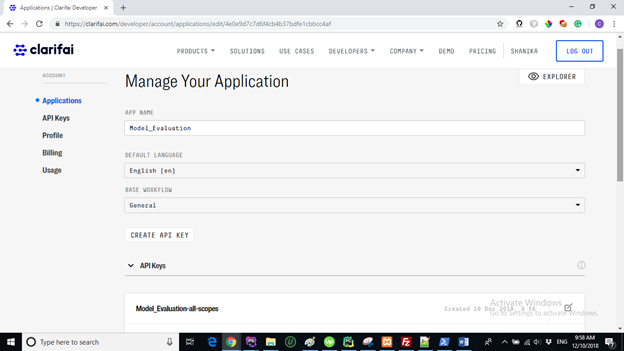
At the moment we are only interested in one thing: API Keys. Click this option in the sidebar, and you will find the API key for your application. This is essential when accessing your model through code or outside of Clarifai’s dashboard. Please keep it secret as it’s how Clarifai recognizes that API calls are coming from you.
Train Clarifai with Images
Let’s write some code! Clarifai supports many programming languages such as Java, Python, and PHP. I will be using Python here as it’s my favorite programming language. You are free to use any programming language as long as you know how to get things done.
Clarifai offers a Python client which makes our interaction with Clarifai incredibly easy. So, let’s first install it. It is very simple to install the Clarifai Python API client. You simply have to run the following command:
pip install clarifai — upgrade
Next, we are going to create our application. For this, I will create a model called pets. Then, I will feed my model two concepts: ‘dogs’ and ‘cats’. Remember that it is required that you provide at least two concepts and a minimum of 10 images per concept. Clarifai recommends providing at least 50 images per concept. But, to keep this tutorial simple, I will only add 10 images per a concept.
First, you have to import the Clarifai module and authorize your app.
from clarifai.rest import ClarifaiApp
app = ClarifaiApp(api_key='Your_API_KEY')
Then, we are going to add our images. Here is my folder structure:
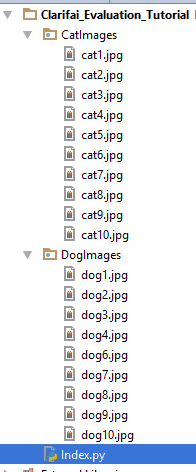
I am going to add images to my application via the Clarifai Explorer.
| from clarifai.rest import ClarifaiApp | |
| from clarifai.rest import Image as ClImage | |
| app = ClarifaiApp(api_key='4545a210c81b421a8e1282201a175a7d') | |
| img1 = ClImage(file_obj=open('DogImages/dog1.jpg', 'rb'),concepts=['dogs']) | |
| img2 = ClImage(file_obj=open('DogImages/dog2.jpg', 'rb'),concepts=['dogs']) | |
| img3 = ClImage(file_obj=open('DogImages/dog3.jpg', 'rb'),concepts=['dogs']) | |
| img4 = ClImage(file_obj=open('DogImages/dog4.jpg', 'rb'),concepts=['dogs']) | |
| img5 = ClImage(file_obj=open('DogImages/dog5.jpg', 'rb'),concepts=['dogs']) | |
| img6 = ClImage(file_obj=open('DogImages/dog6.jpg', 'rb'),concepts=['dogs']) | |
| img7 = ClImage(file_obj=open('DogImages/dog7.jpg', 'rb'),concepts=['dogs']) | |
| img8 = ClImage(file_obj=open('DogImages/dog8.jpg', 'rb'),concepts=['dogs']) | |
| img9 = ClImage(file_obj=open('DogImages/dog9.jpg', 'rb'),concepts=['dogs']) | |
| img10 = ClImage(file_obj=open('DogImages/dog10.jpg', 'rb'),concepts=['dogs']) | |
| img11 = ClImage(file_obj=open('CatImages/cat1.jpg', 'rb'),concepts=['cats']) | |
| img12 = ClImage(file_obj=open('CatImages/cat2.jpg', 'rb'),concepts=['cats']) | |
| img13 = ClImage(file_obj=open('CatImages/cat3.jpg', 'rb'),concepts=['cats']) | |
| img14 = ClImage(file_obj=open('CatImages/cat4.jpg', 'rb'),concepts=['cats']) | |
| img15 = ClImage(file_obj=open('CatImages/cat5.jpg', 'rb'),concepts=['cats']) | |
| img16 = ClImage(file_obj=open('CatImages/cat6.jpg', 'rb'),concepts=['cats']) | |
| img17 = ClImage(file_obj=open('CatImages/cat7.jpg', 'rb'),concepts=['cats']) | |
| img18 = ClImage(file_obj=open('CatImages/cat8.jpg', 'rb'),concepts=['cats']) | |
| img19 = ClImage(file_obj=open('CatImages/cat9.jpg', 'rb'),concepts=['cats']) | |
| img20 = ClImage(file_obj=open('CatImages/cat10.jpg', 'rb'),concepts=['cats']) | |
| app.inputs.bulk_create_images([img1, img2, img3, img4, img5, img6, img7, img8, img9, img10, img11, img12, img13, img14, | |
| img15, img16, img17,img18, img19, img20]) |
You can interact with images for your model in the ‘Explorer’ in your Clarifai Dashboard. Go to your ‘Manage your Applications’ area in the Clarifai Dashboard. There, you can see an eye icon directly on the right side of your application.
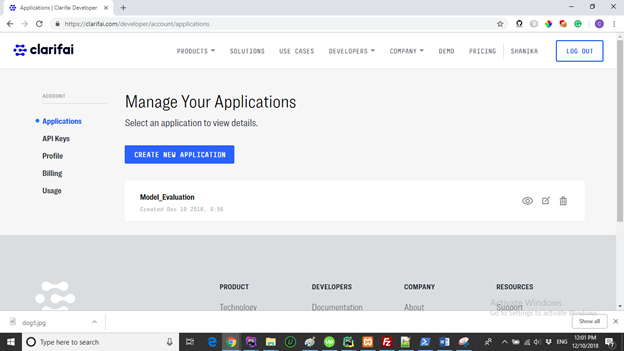
When you hover your mouse over it, you can see a tip with ‘explore’. Click it to see the image interface.
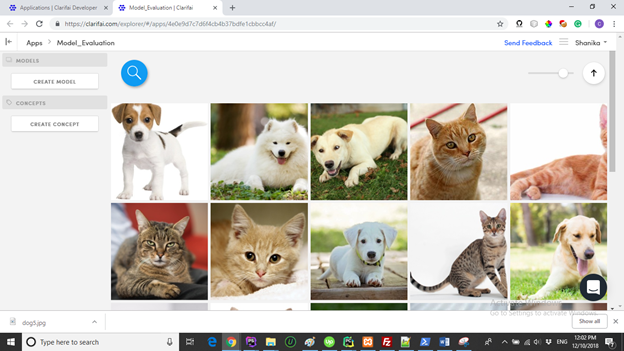
Now it is time to create your model and train it. It’s very simple with the Clarifai API.
app.models.create('pets', concepts=['dogs','cats'])
model = app.models.get('pets')
model.train()
In the first line, we create a ‘pets’ model and give it the concepts ‘dogs’ and ‘cats’. In the second line we get this model and give it the variable name ‘model’. In the last line, we trigger the model to train using any labeled images in the application.
Now, go back to your Explorer.
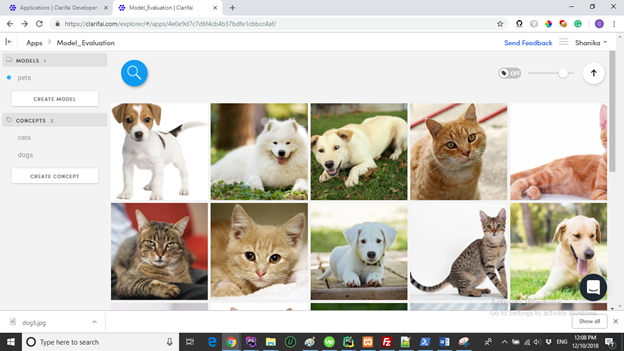
You will see that your model has been created.
It’s now time to evaluate our model! We can continue using the Clarifai Explorer dashboard. Click on the model name that appears on the left panel. You will see the following screen.
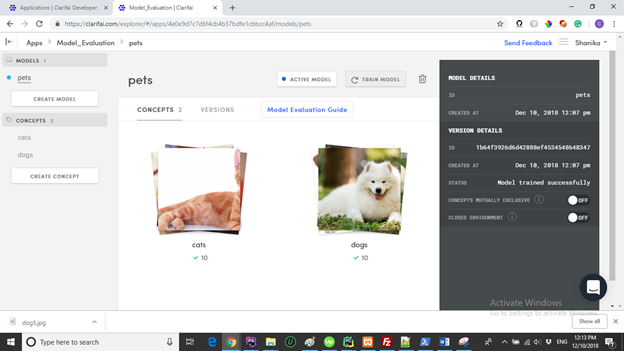
Click on the ”Versions.” It will take you to the following screen:
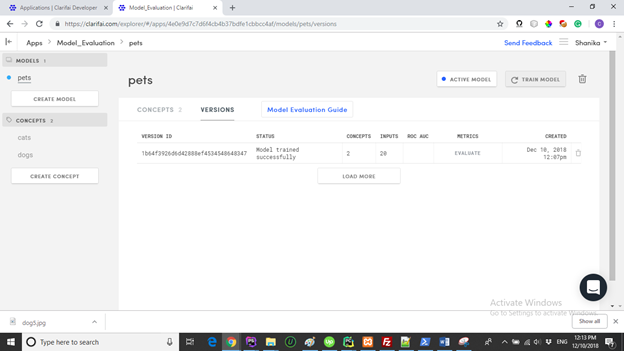
There is only one version available as I trained my model only once. Evaluation is done on a particular version. To evaluate your model, click the evaluate option under Metrics.
This will take a short amount of time depending on the number of images added to your model. My model evaluated in seconds. Once the evaluation is completed, the "Evaluate" option will be changed to a “View” option. Click it, and you will see the evaluation results.
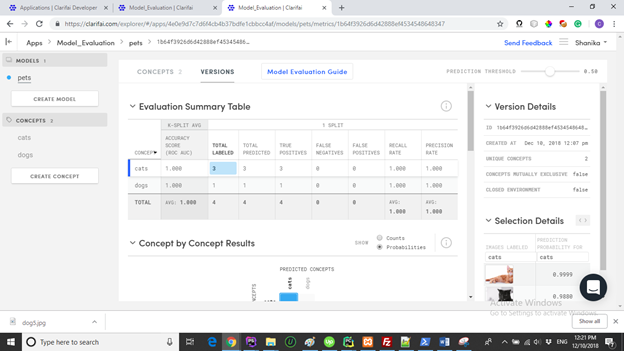
Evaluation results will be categorized under 4 headings: Evaluation Summary Table, Concept by Concept Results, Co-occurrence, Precision-Recall, and ROC Curves. Clarifai does the evaluation using a method called K-split cross-validation on the data.
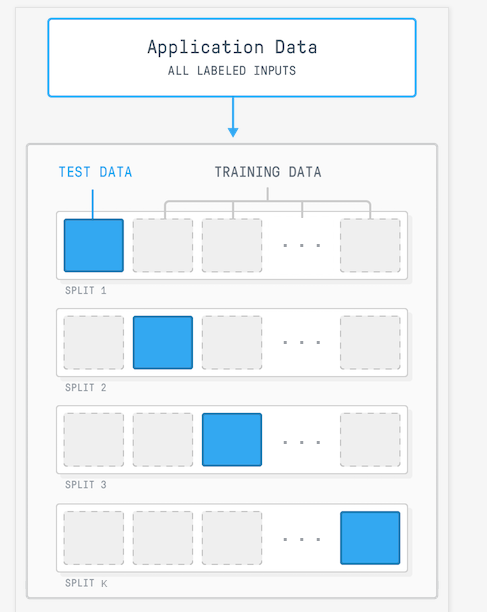
Clarifai uses a random subset of our input data as test data to test against a new model with the remaining data. Then, it predicts the test data against the new model. After that, it compares the predicted labels with the real labels. After performing this multiple times, Clarifai gives each concept a score.
Our next target is finding out how to interpret the results we get. Let’s talk about the evaluation summary table. There is a value called probability threshold, which determines the point at which concepts will be classified as either positive or negative. For example, an image is counted as belonging to a particular concept, such as a dog, only if its prediction probability of that image for the dog is higher than the threshold value. The default threshold value is 0.5. You can change it as you want.
The evaluation summary table shows results based on the current threshold value. According to the summary table, four images were used as test data. Three of them are cats while only one is a dog. According to the table, all four predictions are true positives. That means Clarifai has successfully predicted all test data. So, I get an accuracy score of 1.
Next Steps to Improve Your Accuracy
Now that you have an evaluation tool, you can use this information to improve the accuracy of your models. Adding more images can substantially improve accuracy, especially when your concepts have only a small number of images. You can also tell Clarifai which concepts are not present in an image (negatives). This further refines the accuracy of the model. All of these approaches should improve the accuracy of your Clarifai image recognition models, making your app seem that much more magical!


