This function takes an image (URL) and returns a list of concept tags predicted by the Clarifai model.
Test out the function by adding this line of code to print results for a test image:
print('\n'.join(get_concept_tags('https://clarifai.com/cms-assets/20180320225538/general-006.jpg')))
You can try it out with any image URL. Just type "python clarifai_tagger" to run it. Go ahead! Try it!
Step 3: Sign up for Twilio
Twilio makes it seamless and simple for our humble Python program to interact with communication technologies like phone networks.
For this app, Twilio takes care of managing incoming and outgoing text messages for us and allows us to deal with the SMS message content using an API.
For setup, you need to complete two steps to start:
- Create a Twilio account
- Reserve a phone number that can receive SMS
We'll come back to the settings for your new phone number in Step 5 when we deploy.
Step 4: Set Up Flask Web Server
Flask is a lightweight framework for web development in Python. It's simple, fun to use, and easy to extend.
In our app folder, make an app.py file to be your main Python Flask web server file. We only need to create one "route" with a function that can take an image and return results from Clarifai's API.
You can find a copy of the file I used for this project as a GitHub gist.
| from flask import Flask, request | |
| from twilio.twiml.messaging_response import MessagingResponse | |
| from clarifai_tagger import get_concept_tags | |
| app = Flask(__name__) | |
| #this is a list of concepts we will look for among all possible Clarifai concepts | |
| spooky_concepts = ['scary','eerie','dark','monochrome','spider','spiderweb', | |
| 'arachnid','phobia','fog','mystery','shadow','abandoned', | |
| 'storm','pumpkin','jack-o-lantern','Halloween','dusk','skull', | |
| 'calamity','Fall','danger','satan','horror','vicious','ghost', | |
| 'haunt','cemetery','fright'] | |
| @app.route('/sms', methods=['POST']) | |
| def sms_reply(): | |
| # Create a MessagingResponse object to generate TwiML. | |
| resp = MessagingResponse() | |
| print("Sender: " + request.form['From']) | |
| # See if the number of images in the text message is greater than zero. | |
| if request.form['NumMedia'] != '0': | |
| # Grab the image URL from the request body. | |
| image_url = request.form['MediaUrl0'] | |
| relevant_tags = get_concept_tags(image_url) | |
| ### Compare returned tags to pre-identified spooky concepts | |
| spooky_tags = set(spooky_concepts).intersection(set(relevant_tags)) | |
| if len(spooky_tags) >= 1: | |
| resp.message('Spooooookiness detected! ' + str(spooky_tags)) | |
| else: | |
| resp.message("Didn't trigger my spook detectors.") | |
| else: | |
| resp.message('Please send an image. :)') | |
| return str(resp) | |
| if __name__ == '__main__': | |
| app.run() |
The code allows us to receive POST web requests from Twilio with Flask. It includes a function to query the Clarifai API and send Twilio back a reply with the results.
Step 5: Deploy (Tunnel with ngrok)
Your Flask app will need to be visible from the internet in order for Twilio to send requests to it. ngrok is a great tool for making local programs publicly accessible.
Run ngrok with the following line to tunnel port 5000:
./ngrok http 5000
This line of code creates a public URL access point (with the ngrok domain) and links it to your localhost at port 5000 (where your Python Flask server is running).
Copy the url that ngrok creates for you and paste it into your Twilio phone number settings, as shown in the following images:
Your local machine running ngrok:

Twilio Settings with an ngrok address for when "a message comes in":

Step 6: Try it out!
Run your app:
python app.py
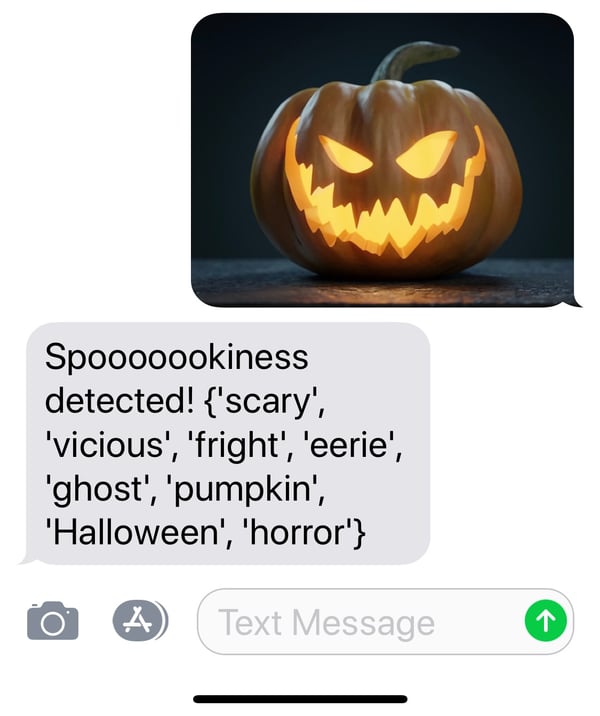
Once your server is running, text an image to the phone number you set up in Twilio. In a short while, you should receive a text in reply!
Wait... so how does this work again?
When you text a photo to your Twilio phone number:- Twilio sends a
POSTrequest to the supplied ngrok url, which points to your machine and triggers the/smsroute of your Flask app. - The
sms_replyfunction is called. - The URL to the image in the text message is passed to the
clarifai_taggermodule - A request to the Clarifai API is made, and a response with keywords associated with our image is returned.
- The
/smsroute responds to Twilio’s request telling Twilio to send a message back with the tags we received from the Clarifai API.
Cool, huh?
CONCLUSION:
Thanks for reading! I showed you how I used Clarifai with Twilio and Python to make our Scarefai hack project usable over SMS. If you followed along, we created a Python program that accepts SMS text messages to a phone number and, if an image is attached, retrieves and returns Clarifai's predictions directly back to the sender.
You can go beyond this and do something clever with the predictions that Clarifai returns. For example, if the image contains fire, send an alert to the nearest fire station.
If you code up with something interesting and want to share with us, we'd love to hear about it. Check out our Developer Guide and sign up to get yourself some API keys!
Acknowledgments
This project inspired by a similar project by our friends at Twilio.


